How to Connect Your iPhone to Your Computer With or Without a Cable
A user-friendly guide to linking and pairing an iPhone with a computer or laptop
Do you want to connect your iPhone to your Windows or Mac computer? You'll just need the charging cable that came with your device and a USB port. If you want to link your iPhone to Windows, you can use Phone Link. For quick photo or video transfers on Mac, you can use AirDrop. This blog will show you how to connect your iPhone to your computer using a wire or wirelessly.
1. Using a Cable
1. Meet the requirements. To connect your iPhone to your computer or laptop with a cable, you must have an open USB-A port and a supported operating system.
For Windows, you must have Windows 7 or newer.
For Mac, you must have macOS X 10.9 (Mavericks) or later.
If you have an iPhone 15 or newer, you can use a USB-C port instead.
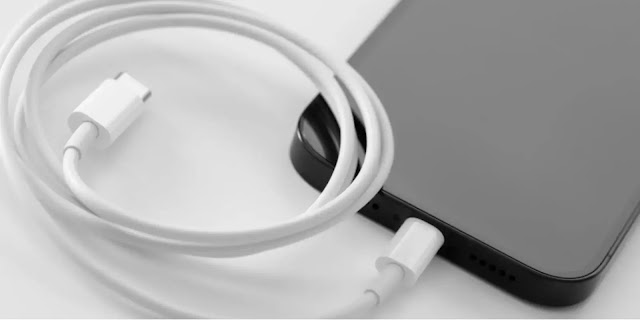
2. Connect your charging cable to your iPhone. This is the cable that came with your device. One end will be Lightning or USB-C, and this is the part that plugs into your iPhone.
If you have an iPhone 14 or older, you'll use a Lightning to USB cable.
If you have an iPhone 15 or newer, you'll use a USB-C to USB-C.
If you don't have a USB-C port on your computer, you'll need to buy a USB-C to USB-A adapter.
3. Connect the USB end to your computer. This will likely be in the back of your computer case or on the side of your laptop. Some desktop computers have ports on the top of the case that can be used.
4. On your iPhone, tap Trust This Computer. If this is your first time connecting your iPhone to a computer, you'll receive this alert. Otherwise, you can skip this step.
5. Use your connected iPhone. Your iPhone is now connected to your computer. If you're using Windows, you can open iTunes to see your iPhone details.[5] If you're on Mac, you can use the Finder.
Here are some things you can do:
- Transfer photos from iPhone to computer
- Add music from your computer to iPhone
- Backup your iPhone
- Update your iPhone
Using Phone Link (Windows 11)
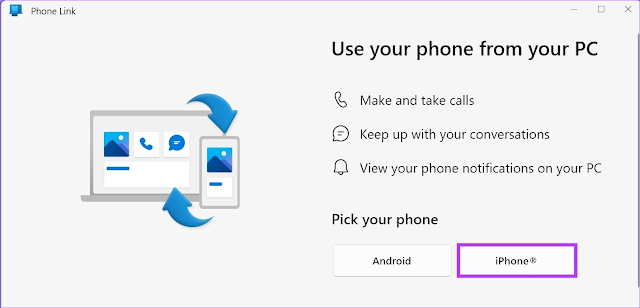
1. On your computer, open Phone Link. Microsoft Phone Link comes preinstalled with Windows 11. To find it, open the Start menu and type "Phone Link." This looks like a blue smartphone icon in front of a monitor.
You can use Phone Link to connect an iPhone to Windows for SMS texting, calling, and managing your notifications. This feature is only available on Windows 11 and iPhones with iOS 14 or higher.

3. Click iPhone. This is the option on the right. A QR code will appear on the screen.
2. On your iPhone, download "Link to Windows." Open the App Store and search for "Link to Windows". This is the app by Microsoft Corporation. Tap Get to install it.
When it's installed, tap the app to open it.
3. Tap Scan QR code. This will open your iPhone's Camera. You may need to tap OK to allow permission.
Alternatively, you can click Continue manually without a QR code instead. You'll be required to open a hyperlink on your iPhone and pair your device through a webpage.
4. Scan the QR code on your computer. This will begin the Bluetooth pairing process. When it has paired, you'll see a pop-up on your iPhone with a code. This code should be the same on your computer.
Make sure Bluetooth is enabled on both devices.
5. Click and tap Pair. Do this on both your iPhone and computer.
6. Allow permissions. You'll receive pop-ups on your iPhone asking permission to receive notifications and access contacts. These must be allowed to sync SMS messages.
7. On your computer, click Continue. Your iPhone will now be connected to your computer.
8. Enable SMS texting from your computer (optional). If you want to send SMS texts from your computer to your iPhone contacts, you'll need to enable it first. Do the following:
- On your iPhone, open Settings.
- Tap Bluetooth.
- Tap i next to your computer's name.
- Toggle on Show Notifications and Sync Contacts.
Using AirDrop (Mac)
Make sure your iPhone and Mac are ready for AirDrop. If you don't have a cable and want to connect your iPhone to transfer files, you can use AirDrop.
Do the following to prepare:
- Place the two devices within Bluetooth and Wi-Fi range of each other
- Enable Wi-Fi and Bluetooth on both devices
- Turn off Personal Hotspot on iPhone
Open the Photos app on your iPhone. You'll find it on your Home screen or in your App Library.
- Tap Library. This displays all of your photos.
- Select the photos you want to send to your Mac. To select multiple photos, tap Select at the top, then choose the photos you want to send. Otherwise, just tap one photo to open it.
- Tap the Share icon iPhone Blue Share. It's at the bottom-left corner. Several sharing options will appear.
- Tap AirDrop. It's the white icon with several curved blue lines. Your iPhone will now scan for nearby AirDrop users and devices.
- Tap your Mac. You'll see your Mac under Devices. Once selected, you'll see an AirDrop notification on your Mac.
Click Accept on your Mac and save the files. Once you click Accept, you'll be asked if you want to accept or save the files.When prompted, choose to save the files to your Photos so you can easily access them in your Mac's Photos app.


.jpg)


No comments